

Patio heaters make it possible for you to continue to spend time on your patio by keeping the open space warm with cozy radiant heat. With the right patio heater, you can maximize the utility of your outdoor space from 6 months to 9 months and even the entire year depending on where you live.
Maintaining a patio heater can be a bit of hard work and requires a little bit of know-how on the mechanics of the heating system to get maximum efficiency and use out of any unit.
When your patio heater won’t light, and you are not out of the fuel source, the thermocouple is typically the culprit. Before running out to purchase new parts here is what you need to know.
You’ll need some common household items like; screwdriver, Emory cloth, wrench and some common sense.
Here Are the Steps for the Cleaning Procedure:
- Shut gas off
- Locate the gas control box ( the fuel supply goes into it)
- Locate the thermocouple ( near the flame)
- Remove thermocouple for ease of cleaning
- Clean by lightly sanding
- Replace thermocouple as it was
- Turn gas on
- Light
The above is a simplimatic list of how to clean a thermocouple on a patio heater. For more detail please keep reading we even throw in some pictures. Of course each manufacturer is a little different, but they all follow the same principle.
First to understand the importance of the thermocouple on a patio heater let’s dig into what the thermocouple does.
What Does a Thermocouple Do on a Patio Heater?
A thermocouple is a safety device that senses heat from the flame and allows the gas to stay on. If the thermocouple cools or fails it will think the heat is not present and shut the flow of gas to the heat or combustion area.
How Does it Work?
A thermocouple is made of two different metals connected at one end, and when heated or cooled the two metals create a voltage. In a patio heater once the heat reaches a certain point it generates enough voltage to engage a solenoid to allow gas flow.
What makes a thermocouple not work?
Often the main reason is actual failure or excessive carbon or debris build up. The rest of this article will cover the cleaning of a thermocouple and extending its life.
The 8 Simple Steps…
Turn off the Gas Supply
Once you have located the thermocouple, turn the gas off to the furnace. After that, unscrew the thermocouple from the control box and take it out from where it’s attached near the pilot light.
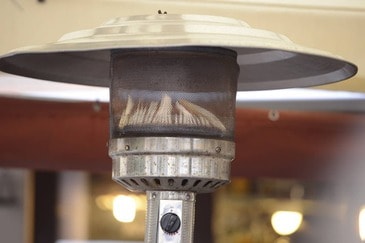
Locating the Thermocouple & Gas Control Box on a Patio Heater
One of the most common causes of a heater breakdown is the failure of the thermocouple. When this component is faulty or dirty, the heater won’t light up. In order to fix this problem, you have to first locate this component.
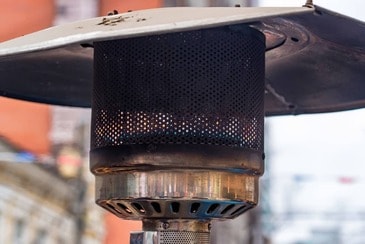
The thermocouple typically ties into the gas control box on one end and the other end is usually where the pilot light flame is. This is the end that may need cleaned.
The control box in which the main gas line enters. This is where the thermocouple sends a voltage to engage a solenoid to allow gas flow. To find this box…follow the gas line from the tank.
Removing the Thermocouple
The thermocouple is the smallest line connected to the control box. Locate the pipes leaving the control box and notice the smallest pipe that’s leading up to the main burner. That is your thermocouple connection.
The thermocouple at the pilot light most likely has a screw that holds it in place, depending on the manufacture, however most now days use a Philips head screw.
NOTE: if you see excessive dirt or carbon build up and can access it easily there is no need to remove the control box end.
Sometimes for simplicity it is best to remove both ends to work on the thermocouple. This is where the wrench (3/8″ to 1/2″ typically) or (9mm to 13mm).
Make sure you have a snug fit or it can round or strip the nut. Again, this should be the smallest tube going into the control box.
How to Clean a Thermocouple on a Patio Heater
Once you have taken out the thermocouple, it’s time to clean it. Most times soot builds up on the thermocouple, making it unable to detect heat build-up.
You see carbon can absorb the heat and act as a shield keeping the heat from getting up to temperature and thus preventing sufficient voltage to engage the solenoid.
Also, see if the ends of the thermocouple are corroded. If that has happened, this might be preventing the power from reaching the control box.
Most Patio Heaters that use a thermocouple use one like this available on Amazon if you need a new one? Double check fitting size and length for compatibility! Click here to check it out.

Rub with Emery Cloth Sandpaper
Take a piece of sandpaper and rub the ends of the thermocouple to remove the corrosion. Sandpaper is usually attached to a piece of fabric so holding it in your hand and rubbing it against any area is easy.
Continue rubbing until you see no sign of corrosion on the ends and the piece is neatly cleaned.
Wipe the Thermocouple with a Soft Cloth
Take a clean piece of a soft cloth and wipe the piece with it. The reason for doing this is to remove any remnants of corrosion that were left uncleaned by the sandpaper.
Use a Can of Compressed Air
Another method of cleaning a thermocouple on a patio heater is using compressed air. This method can be used alternatively if sandpaper is not available at your home or if you don’t detect corrosion on the ends of the thermocouple, but only dirt or soot build-up outside it.
You can simply use a can of compressed air and blow away any dust or dirt particles from the thermocouple. Once done, wipe away any remaining dirt or soot on the thermocouple using a separate clean cloth and rub until it’s clean.
You can can find compressed air on Amazon by clicking here
Use Steel Wool or Sponge
Another way of cleaning a thermocouple on a patio heater is by using steel wool or a sponge. You can take steel wool or the abrasive side of a sponge to gently remove the soot or dirt without causing any damage to the thermocouple.
Make sure to not use any cleaning products like dishwashing soap or detergents. These cleaning agents have flammable chemicals. If any of the particles latches on the surface and is not cleaned properly, it can pick up the fire and blast the pipe, hurting you or the people around the heater.

Clean Between the Threads of the Screw
While you are cleaning the thermocouple, you can also erase the dirt that gathers up between the threads of the screw that tightens the thermocouple. Use a pencil eraser to clean between the threads and remove the remnants of the eraser with a clean piece of cloth.
Blow on the threads gently to manually remove any particles left by the eraser. You have to be sure that the entire thermocouple is cleaned and spot-free.
Reattach the Thermocouple
Once you are done cleaning the thermocouple using any of the methods above, reattach it to the pilot assembly.
Follow your instruction manual to see how to reattach the thermocouple, if your patio heater comes with a different design.
Check for leaks
You can check for gas leaks prior to trying to light the heater for safety. Allow the gas supply to be turned on, and have a spray bottle of soapy water ready to spritz the connection areas.
Go Ahead and Light Your Patio Heater
If you went through all the above processes you are ready to try and light the heater. Remember it will take a little while for the gas to fill and supply all the lines.
If it does not light, or stay lit you may need to consider replacement. The process is the same just no cleaning involved.
Consider Replacing Your Thermocouple
If, by taking out the thermocouple, you notice that it’s so corroded that even cleaning it with sandpaper might not salvage it, consider replacing your thermocouple altogether.
Thermocouples are easily available at most home hardware stores and are a quick fix that helps keep your patio heater working at optimum efficiency. If you have time until you need your heater again, you may want to consider getting it from Amazon and replacing it between the weekends?
Here are all the patio heater thermocouples available
To learn more about checking for gas leaks and tank changes, this article about How Long Will Your Propane Tank Last on Your Patio Heater will have it included.
Hope you enjoyed and found something useful!